Wednesday, October 31, 2012

Reusable grocery bag

I don't know about the rules where you live, but here in San Jose, if you don't bring your own bags to the store, you have to pay for a paper bag. Plastic isn't even an option anymore (yay!). So, to save roughly 10 cents per bag, we use our trusty old Trader Joe's bags. (We haven't even shopped there in years...) And our Kaiser bags. And REI bag. And NOW, our homemade bag. What whaaaaaat. Yeah, I made a bag, and, I gotta say, it's stinkin' cute. And I'm really proud of it. (Just wait, next week the bottom's gonna bust out and I'll be crying over broken eggs.)

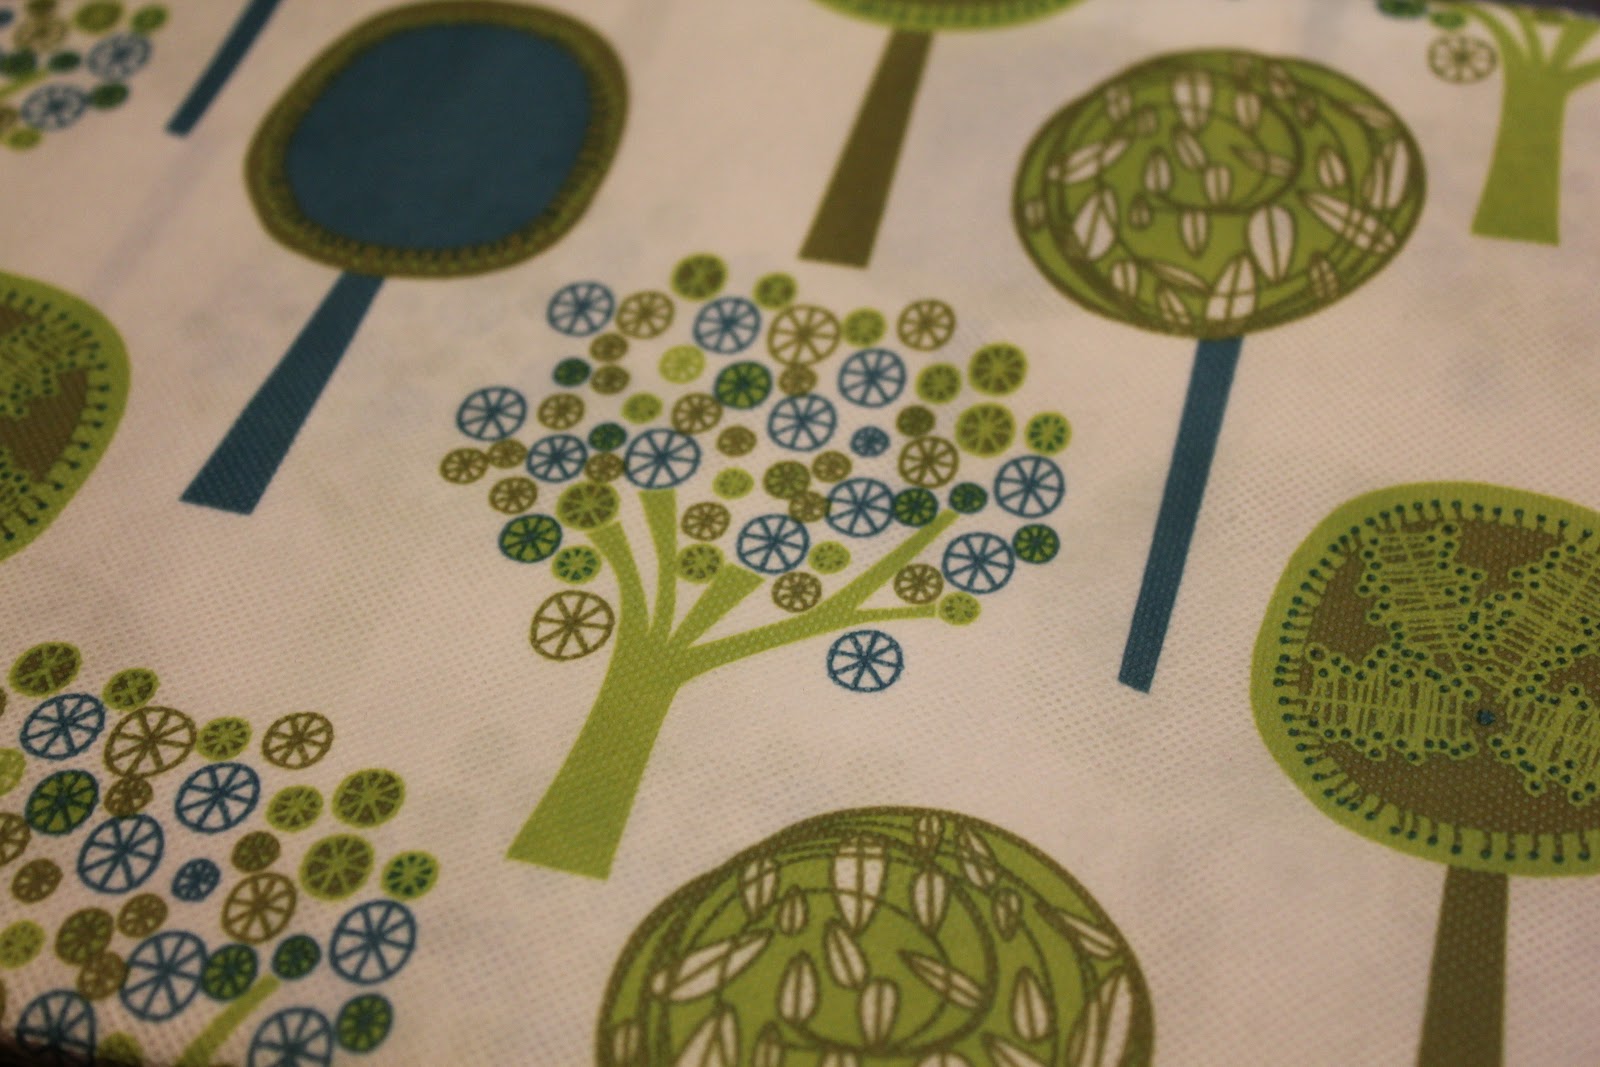
When I saw the material at the store, I knew I had to get it and make a grocery bag out of it. I'm pretty sure that's what it's made for. I don't even know what it's made out of. It seems a little like a paper/plastic composite. Kinda all weathery. And cute!


So I can't take all of the credit on the design, but I didn't necessarily follow a pattern. I gathered ideas from here - which, her idea of recycling plastic bags is awesome! And I must admit, her bags end up being way cuter than mine.

To get the size bag I wanted, I traced good ol' faithful. I cut the front and back long so that I'd have an overlap on the bottom, making the bag double strong.


I'm really glad I looked at DanaMadeIt before I started sewing, because I honestly didn't even think about attaching the handles to the bag first. I would have been trying to sew them on after the bag was all assembled. Crisis averted!

So first, I made the handles. Since they were so long, I had a hard time keeping the seam straight and keeping the fabric from buckling. I sewed them inside out, then turned them right side out - that took all of Monday night's episode of Revolution. It would have been handy to have had one of those nifty tube turning gizmos. But alas, I used my now sore fingers and a pair of tweezers. Yeah. I'm resourceful like that.


Next, I sewed down the top edges of the bag. I tacked down both sides before pulling the long haul and risking my seam going all wonky. I folded down twice, too, so that you wouldn't be able to see any raw edges.


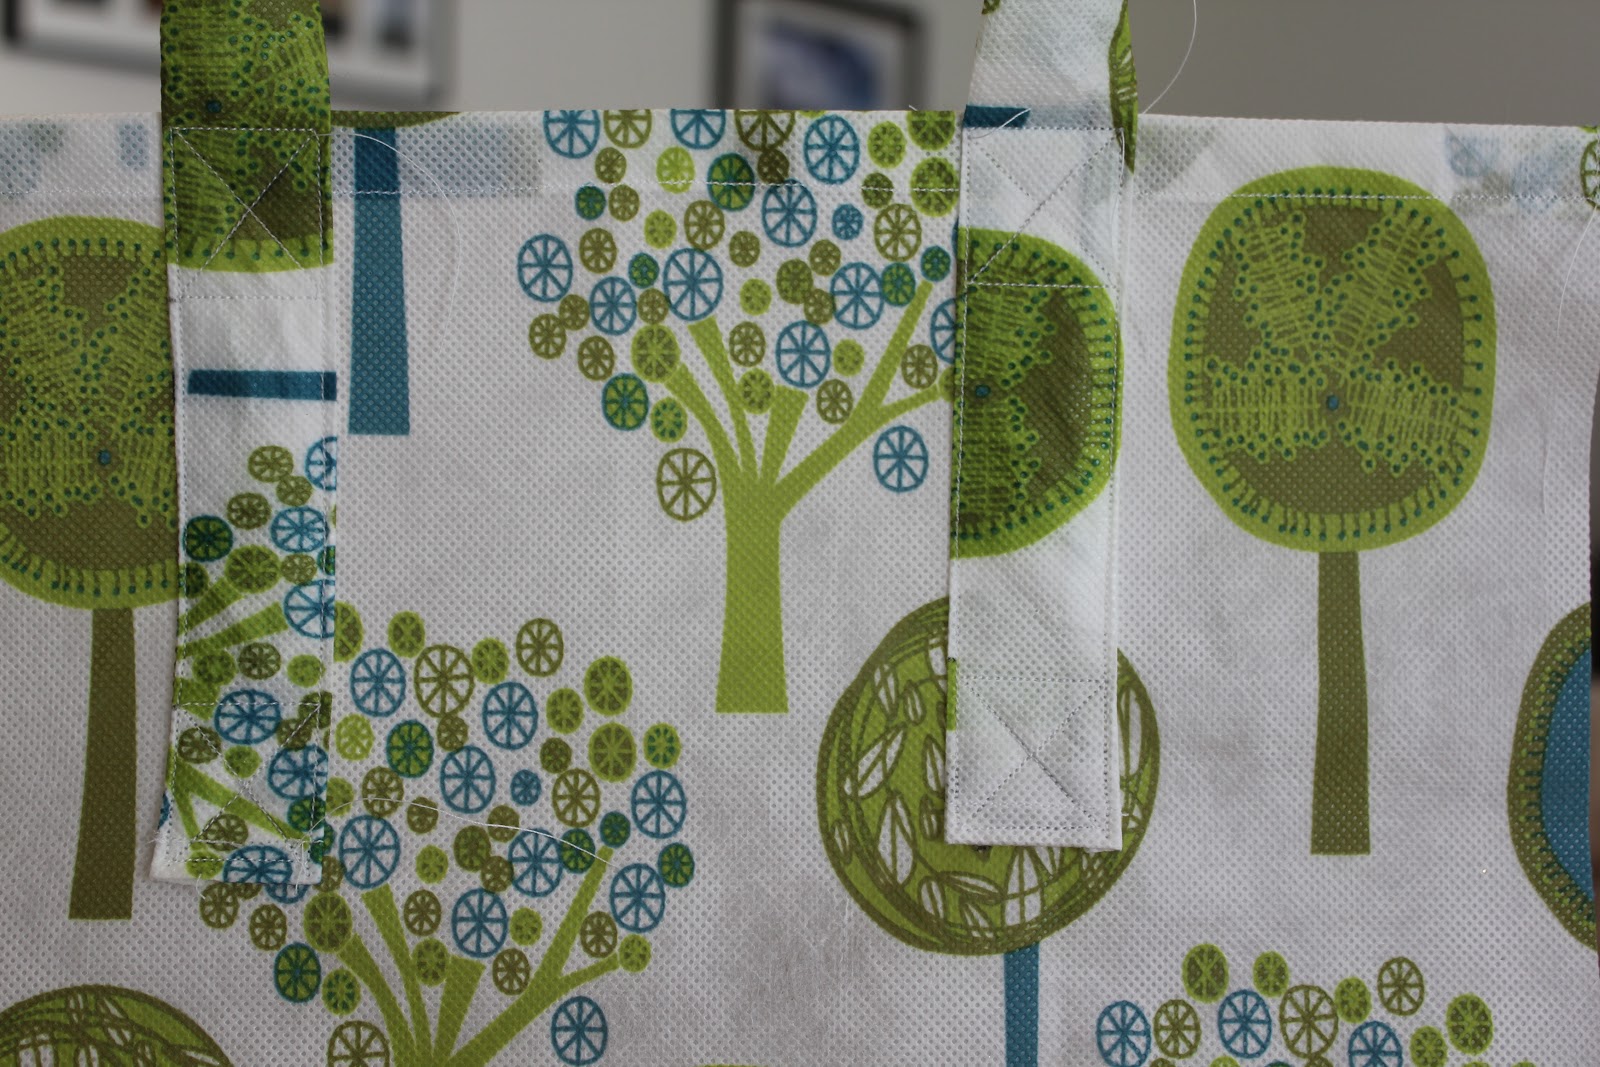
Attaching the handles was actually easier than I thought it would be, and I was quite impressed with my abilities. This sewing thing is coming a little more naturally. The fabric doesn't get away from me as easily, as I've learned what pace I can handle.


I even reinforced them with "X"s! I think that's the part I'm most proud of. I mean, it's almost, like, a real bag.

Then I sewed the front/bottom/back together, which, now that I think of it, could have been one big piece. HOWEVER, I wanted that double reinforced bottom. So there. I kind of double sewed everything to make the bag super strong, so there are two lines on every seam. I think it also makes it look nicer.

Next came the side panels. I sewed them on face to face with the front of the bag, likeh zo:


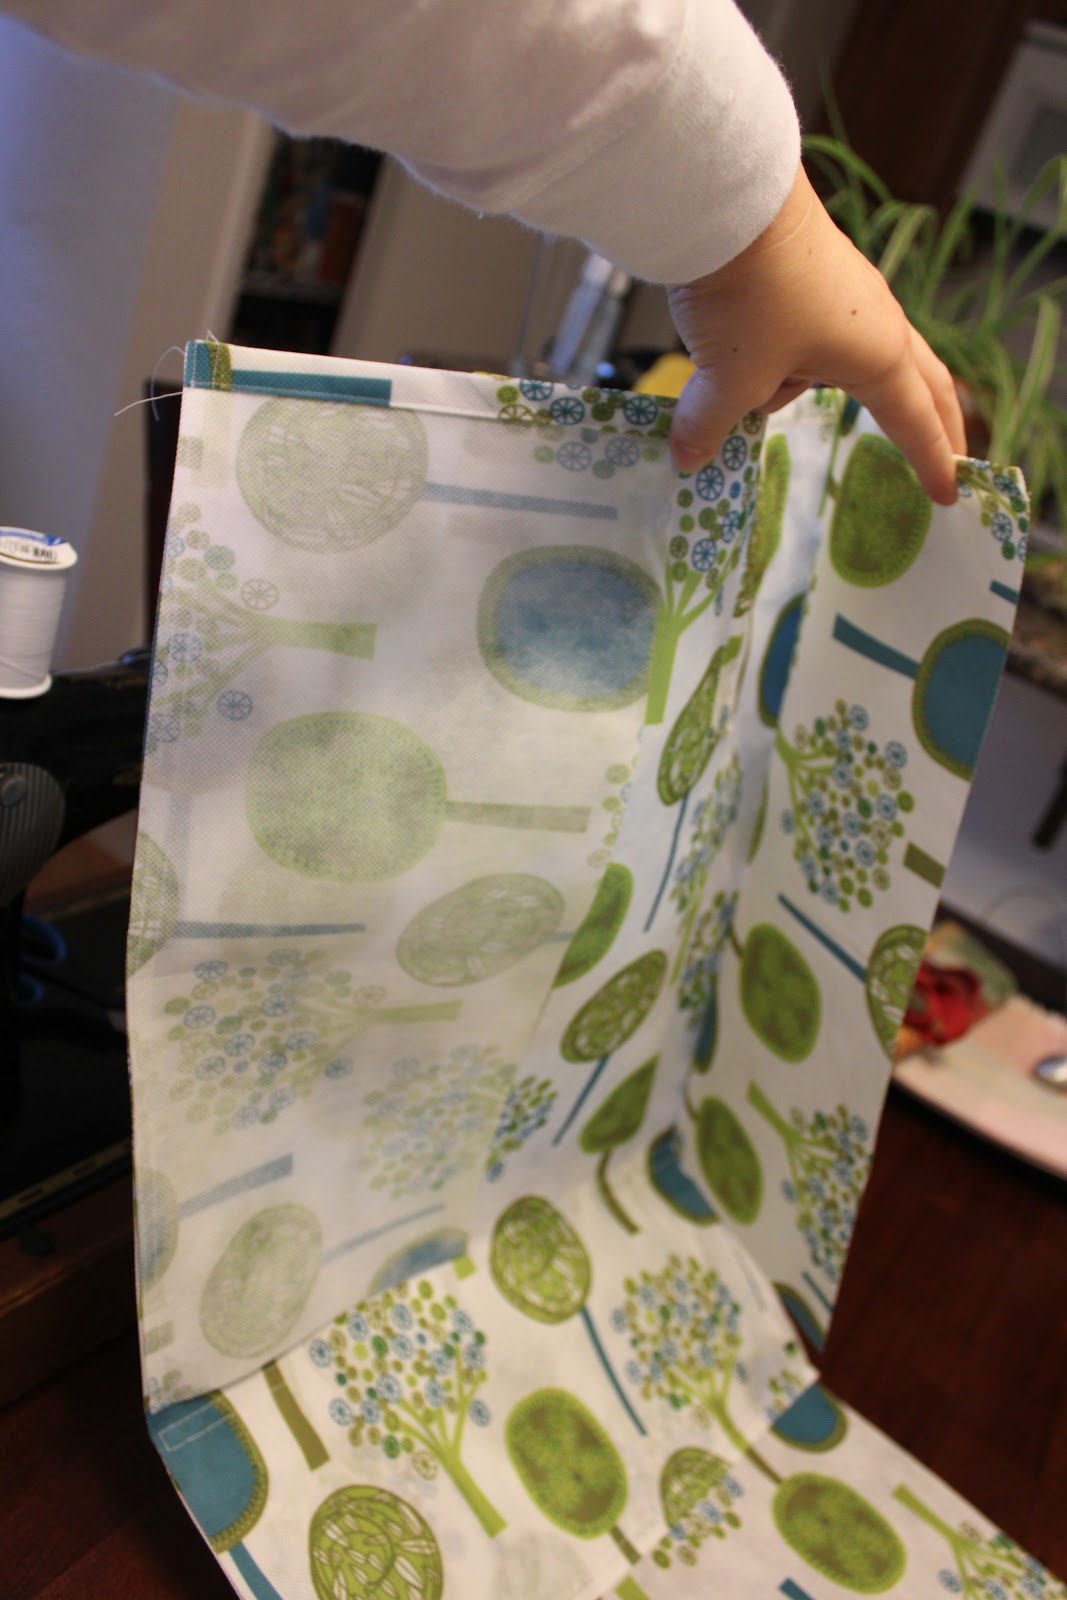
Then attached the side panels to the bottom and back panel. This was probably the trickiest part of the project, since, by this point, there is so much material you're dealing with, and it's all attached, and it's everywhere, and it's in the wrong place, and and and. I ended up crumpling a bunch of the fabric up to get it out of the way a time or two. Or three. After all was sewn together, I flipped it right side out.

And this, my friends, is the finished product!


Like I said, I'm pretty astonished with the outcome, and I'm very proud to say that I created something as quality as this. I kind of feel like Tom Hanks in Castaway when he makes fire for the first time. I even USED this bag today, toting my books and candy corn to Bible Study (which hardly anybody ate - come on, ladies! I'm trying to get RID of it! :D)

Please note, this is not meant to be a tutorial, but if you'd like to try what I did, feel free. You might be more successful than me!

Next, I might try to hem up the crib's bed skirt, as it's too long now that we've lowered the mattress. Or I might make a smaller bag like this one, since this is more grocery sized, and I think I'd like a more tote sized one too. I was also thinking of making some coffee cup cozy thingamabobbers.

Choices, choices!

Monday, October 29, 2012

Through many dangers, toils, and snares...

Okay, so maybe not dangers, but DEFINITELY toils and snares. I hit a few speed bumps in my car seat belt covers, for sure. I've been contemplating not showing or telling you about my failures, but not only would that be dishonest, it would be defying the purpose of this blog. Isn't it my point to show you all the misadventures?

Without further ado:

I needed Velcro.
I got Velcro.
Apparently the wrong Velcro.

Did you know they made right and wrong kinds of Velcro?
Me neither.

I got the kind that has adhesive on it. I didn't know that would make a difference! Plus Target didn't have any other kind. (Note to self: never buy sewing supplies at Target.)

The Machine does not like adhesive. It boogers up the needle and makes the thread do horrible, nasty things.

So I yanked the nasty Velcro out and did without while I worked on the edges. I don't even know what it's called. It's not piping...just...edging? Whatever. Anyhow, this is my first sad attempt:

Notice the seam puller to the right...
 After several attempts, I finally got that edge ... satisfactory. Of course, later I read some advice in the comments of this site about tacking down both ends before sewing all the way across. That would've been helpful. Then this happened:

Ugh...
 Then, I came up with the clever idea of having a little dangly toy/binky hook and hastily attached it to the unfinished edge. Uh. How'm I supposed to add the edging to that side?

Ughhhhh...
 At this point, I was really starting to hate what this thing looked like, so I tore it all apart. I pulled every seam out. Every stitch. Well, except the quiltified bit. Then I went Googling. There had to be a better way. I found this blog. Duh! I was making this all too hard on myself.

I sewed the cover with the batting on top and the two outside fabrics facing each other together, leaving a hole on top:


Then I flipped the whole thing inside out, sewed the hole shut, slapped on some NON-adhesive Velcro (that I found at JoAnn - thankyouverymuch), and called it a day. Once I had ripped out all of the seams (which took about an hour), both covers were done in about half an hour.


Here's the finished product! I did find a way of adding the toy/binky attachment, with the help of Cody. For some reason, I just couldn't see it in my head. Oh, and best part? They're reversible! Didn't even mean to do that. Ha!

Are the Etsy worthy? Mmm...I don't think so. But I bet the next batch will be! I need to figure out how to make the toy/binky attachment thinner. As it is, I think it looks too bulky, but I couldn't figure out how to turn anything thinner right side out!

The Ava bug all cozy on her new covers after a successful stay in the church nursery.

And if that weren't enough work for one Saturday afternoon, I took on another project. One started by my mom about 100 years ago. She had found this tapestry of a couple of fishermen and thought it would make a great pillow for my dad (who loves fly fishing). She cut out backing made of blue corduroy, but never completed the project. (A recurring theme in our family, in regards to crafts.)

All I had to do was iron the material (as they had been shoved in a bag for said 100 years), sew them together inside out (leaving a hole), flip them right side out, stuff it, and close the hole.


20 minutes and only one massive pin prick later, viola! We have a pillow! Not bad, eh?

What's next?
Well, I did pick up this cool material that will be perfect for a reusable grocery bag...

Wednesday, October 24, 2012

And it begins...

There was much pondering on what project I would start with on The Machine. I have a list of roughly twelve thousand things I'd like to make, including several items for Christmas. However, due to my limited sewing supplies, I decided to start with some car seat belt covers. I figured it would be a simple enough shape - no curved lines or anything weird.

So I started with a pile of scraps my mom bequeathed upon me. These particular scraps are from a quilt that she made for Ava.  None of them were big enough to create aforementioned project, so I thought, maybe I could quiltify it. Yeah, I just made that word up. All you MCS* quilt ladies would be so proud of me!


Since this pile of scraps was shoved in a bag and left to die for nobody knows how long, it was a bit wrinkly. I went ahead and busted out the beloved iron. (Does anybody actually like to iron?) 


I snipped the fabric into the lengths I thought would work and laid them out in an arrangement that I found pleasing. By the way, I'm not using a pattern for this, heh. It's one of those fly-by-the-seat-of-your-pants projects.


The first line could've been prettier, but you'll see, you can't even tell! That's what I'm telling myself, anyway. I found that I just have to go slower, otherwise the fabric gets away from me, and I end up with curved lines. Could this be a lesson in patience maybe? Hmmm.


 Again with the iron. This time I'm ironing the seams down in what I think might be the correct way...??? I split them open and pressed them down. It seemed to add the least amount of bulk.


So far so good...
Next, I pinned the strip piece to some batting and a lovely flannelly fabric (I have so much to learn...) and sewed a line straight down the middle perpendicular to the seams already sewn, then a line on either side of that center line, about halfway between the edge and the center line.


I didn't sew it like this, if you're wondering, I was simply "posing" the piece on The Machine. I later realized that it looks like I was trying to sew like a buffoon.

See how pretties?


This I what I have at the moment. Two unfinished car seat belt covers. They look pretty awesome at this point, in my humble opinion. Okay, there are some crooked lines, but cut me some slack! This is the FIRST thing I've ever made on a sewing machine. So far, this project isn't taking forever. I think I really only spent about two hours, maybe, working on it. And that's with the slow start, getting a feel for The Machine and all.


What I need now is some Velcro, which I plan on getting tomorrow. Then I'll slap some of that goodness on these things and figure out what to do with the edges.
 

*MCS is Milpitas Christian School, where I taught music for four years. Lots of the ladies there are phenomenal quilters. They're hard core, too. They have "quilting parties", where they pull all nighters quilting. Yeah. I know. Right?

Tuesday, October 23, 2012

The Machine

I picked up the machine tonight! I've been itching to get started on some sort of project. My mom was even gracious enough to give me some scraps of fabric to practice with.

When I found out that I would be able to use my grandmother's old sewing machine, I thought it would be one of those white machines that most people sew on these days. Little did I know I'd inherit (albeit temporarily) a 43.2 pound Singer behemoth from 1952 (Yeah, I weighed it, and yeah, I looked up the serial number). It's beautiful, and I got a little verklempt when my dad took the cover off. My grandma passed away several years ago, and I miss her dearly.


Dad told me that he remembered his mom sewing her own clothes on this machine. I can't imagine her lugging this thing out - it's so stinkin' heavy!


This machine looks like it's never been used, but I know otherwise. Mom showed me how to thread the machine, wind a bobbin, and I even sewed a line! It was super straight, too, I might add.


As I was tinkering around with it tonight, I smelled Grandma when I took the cover off. You know how a smell can instantly take you back? It smelled like her old house, before she moved to the retirement home. Like cookies, and hugs, and Mary Poppins. Like sweetness, like love.


I can't even imagine all the things she made on this machine. I can only hope to make something worthwhile on it.


I was also happy to see that the machine was made in the USA.  Apparently made of LEAD, too. Holy smokes. I nearly threw my back out lifting the thing up. (Reminder: lift with the legs.)

As far as sewing machines go, this is as basic as it gets. No zigzag lines, no fancy quilting doohickeys, just good ol' straight lines. Tomorrow (hopefully...maybe), I shall document my first attempt at...something.

By the way, I never claimed to be a photographer. Be ye warned.

Sunday, October 21, 2012

This crazy idea...

So. I'm newly a stay at home mom. My daughter, Ava, is a genius child, already evident at just 10 months old. (Not really, but what mother doesn't dote on their child?) This is a pretty sweet gig, I must say. I get to be the primary caregiver to my daughter and see every little new thing she does, like, ever. She's still not crawling, but she's close! Oh, and she just busted three teeth out last week. Yeah, that was fun. My gracious husband, Cody, works hard as a regional property manager and has allowed me to quit my job as a music teacher to stay home. I've been at this for about four months and I feel I'm finally getting a rhythm. So much so, that I'm finding that I'm yearning to use my creative juices and actually feel that I have time for it.

Enter crazy idea: I should learn to sew and sell my wares on Etsy! (This would help, hopefully, with the budget.)

Have I ever sewn in my life?
Psh.
Irrelevant.

Do I have a sewing machine? Or the budget to buy one?
Ha!
Also irrelevant!

Sure, I've sewn on buttons, even hemmed a few pairs of pants. All by hand though. Truth be told, I'm a leeeetle bit afraid of sewing machines. I just have a horrific image in my head of me sewing my fingers to whatever beautiful project I'm making. BUT. I'm gonna get over that. Heh.

My mom has a spare sewing machine that belonged to my grandma that she's going to let me borrow/have/steal. I hope I can do grandma proud and make something that's worth something to someone on her old machine. I haven't seen said machine, and I've been told, "It's not fancy." GOOD. I don't think I want to start on one of those fancy machines. Sounds complicated. Like learning the internet when you're 80 or something. I may graduate to one of those eventually. Maybe Santa will smile upon me at Christmas.

But FIRST, I need to see if I'm even any good at this! Hence, this blog. I figure, this is going to be funny. I'm going to make a lot of mistakes, and all you crafty people out there are going to laaaaaugh at me, shake your heads, and maybe give me pointers and suggestions. (Please?)

Anyhow, I was just at my parents' house tonight. And did I bring the sewing machine home with me? No. Why? Well, there's not really a very good excuse besides the fact that Ava had only napped for roughly 40 minutes ALL DAY. Usually she gets a couple/few naps totaling around 4-6 hours. She was grumpy, so we tried to get home quickly once we realized that she was absolutely NOT going to nap at Grandma and Grandpa's house.

So I forgot the stinkin' sewing machine.

I guess I'll have to wait to start on my oh-so-creative masterpieces that I know you're all going to want to buy.